

That empty wall in your living room isn't just a blank space—it's an opportunity. A great photo frames wall design turns this canvas into a story, showcasing memories and art that define who you are. The secret is transforming your vision into a stunning gallery wall that looks curated, not chaotic.
Transforming a Blank Wall into a Personal Story
That empty wall you've been staring at is a canvas ready to showcase your favourite memories, display art that moves you, and tell a unique story about who you are. But turning that vision into a stunning gallery wall can feel overwhelming. Where do you even begin?
The process often raises more questions than answers. How do you pick the right frames? What's the secret to an arrangement that looks balanced instead of cluttered? This guide will demystify the entire process, moving beyond generic advice to share practical techniques for every stage.
From Vision to Reality
We’ll cover everything from finding your unique style to hanging the final piece with absolute confidence. You’ll learn how to create a layout that feels intentional and serves as a meaningful focal point in your home. These steps ensure your wall becomes something you’ll love for years.
A well-designed gallery wall does more than just fill a void; it infuses personality and warmth into your space. It can tie a room together, add a pop of colour, or simply serve as a daily reminder of the people and places you hold dear. For more inspiration on creating an inviting atmosphere, explore our guide on the latest home decor trends for creating a warm and inviting space.
Why a Gallery Wall Matters
Creating a personal gallery is an accessible way to make a significant design impact without a major renovation. It’s a flexible project that can evolve over time as you collect new art or capture new memories. The key is thoughtful planning, which prevents unnecessary nail holes and ensures the final result matches your initial inspiration.
A gallery wall is more than decor; it's a visual narrative of your life. Each piece, whether a photograph, a print, or a personal memento, adds a chapter to your home's story.
Ultimately, designing a photo frame wall is about curating joy. It’s an exercise in surrounding yourself with things that make you happy. With the right approach, you can confidently turn any blank wall into a beautiful and deeply personal statement piece.
Finding Your Gallery Wall Style
Before a single nail hits the wall, the real magic begins with a bit of creative daydreaming. What's the vibe you're going for? A truly great photo frames wall design isn't just a random collection of pictures; it's a piece of your personality, an extension of the story your home already tells. Nailing this down first makes every other decision—from frames to layout—fall into place much more easily.
First, think about the overall mood. Are you craving something clean, organised, and structured? That often points towards a symmetrical grid layout. Picture frames of the exact same size, colour, and style, all lined up with precision. It’s a classic, sophisticated look that brings a sense of calm and order, working beautifully in minimalist or contemporary homes.
Eclectic Salon vs. Modern Grid
On the other hand, maybe you're drawn to something a little more free-spirited and organic. This is what we call a "salon-style" hang. It’s all about mixing it up: different frame styles, a variety of sizes, interesting textures, and even a playful use of colour. The final effect feels like a treasured collection that’s been built over time, which is perfect for bohemian, traditional, or maximalist spaces. There are no hard and fast rules, giving you so much more room to play.
The story you want the wall to tell is just as crucial. Will it be a timeless collection of black-and-white family portraits? Or maybe a vibrant explosion of colourful travel photos that brings a burst of energy to the room? Don't be afraid to think outside the box and mix in abstract prints, personal keepsakes, or even your kids' first drawings.
The heart of your gallery wall is its content. Let the photos, art, and mementos you absolutely love be your guide. When you do that, the final result will always feel authentic and truly you.
Pulling Your Theme Together
Once you have a general direction, it's time to find a common thread to tie it all together. This doesn't have to be super literal. It could be a subtle colour palette that weaves through each piece, creating a sense of harmony. If you need some ideas, our article on top home decor colour trends to refresh your interiors is a great place to find inspiration.
Your theme could also be based on a subject—like a wall of botanical prints or architectural sketches—or even a feeling you want to evoke, like serenity or adventure.
This desire to create personal, meaningful spaces is a growing trend. In fact, the market for picture frames is set to grow annually, driven by our collective focus on making our homes beautiful and unique. Taking the time to pinpoint your aesthetic from the start really does simplify everything that follows, ensuring your gallery wall is a cohesive masterpiece you’ll love for years.
Mapping Out Your Layout with Confidence
A truly stunning photo frames wall design is all about the prep work. The secret to getting that professional, polished look without riddling your wall with unnecessary nail holes is to create a template first. This is the stage where your vision really comes alive, letting you make all the adjustments you need before committing.
One of the most reliable methods is using simple craft paper. Just trace each of your frames onto the paper, cut out the shapes, and use a bit of painter's tape to arrange them on your wall. This trick is a game-changer because it lets you physically see the composition and play around with it until it feels just right. You can shuffle pieces, test different spacing, and get the balance perfect.
Visualising Your Arrangement
As you start placing your paper templates, pay close attention to the spacing. A consistent gap of 5 to 8 centimetres between each frame is a great rule of thumb. It creates a clean, intentional look that helps unify the entire collection, even if you're mixing and matching different frame styles and sizes.
Think about the overall shape you're going for. Are you creating a tight, structured rectangle over a sofa? A sprawling, organic design that climbs a staircase? Or maybe a narrow vertical line-up for a small sliver of wall? Each space really calls for its own unique approach.
The graphic below breaks down the key things to think about when planning your wall's overall aesthetic before you start mapping.
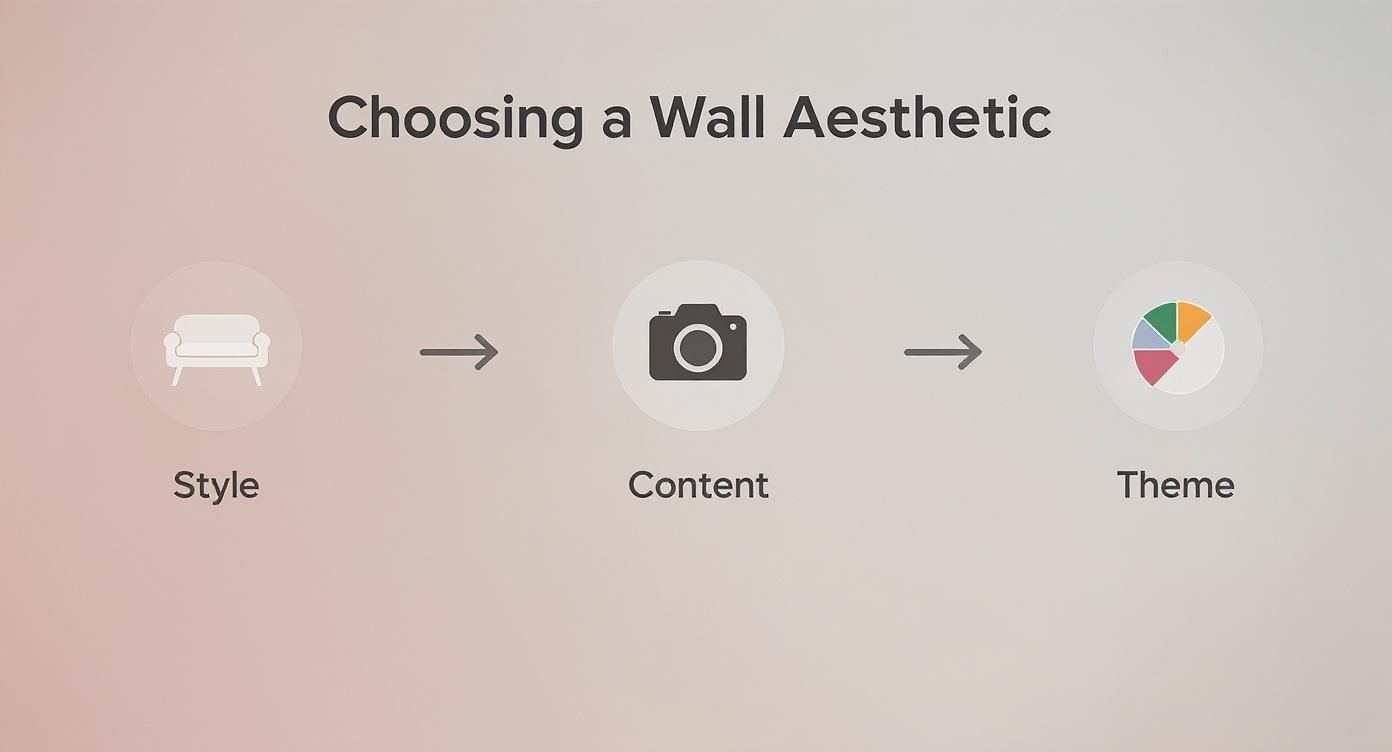
This just goes to show how your decor style, the art or photos you've chosen, and an overarching theme all need to work together to create that cohesive vision you're after.
Anchoring Your Design
A great way to kick off the arrangement process is by placing your largest frame first. This "anchor" piece gives you a solid focal point to build the rest of the gallery around. Try positioning it slightly off-centre; this little trick encourages the eye to travel across the whole collection instead of just landing in one spot.
From there, place your second-largest piece diagonally from the first to create an immediate sense of balance. The smaller frames can then be used to fill in the gaps. This method is brilliant for preventing the layout from feeling lopsided and helps create a more dynamic, visually interesting composition. It’s all about distributing the visual weight evenly across the display.
A gallery wall shouldn’t feel like an afterthought. By treating it as a single, cohesive piece of art, you give it the presence and impact it deserves in your room.
For those who lean more digital, there are powerful alternatives to paper templates. If you want to simplify the visualisation process for your gallery wall, exploring free online room design tools can be a massive help. These platforms let you upload images of your art and arrange them on a virtual wall, allowing you to finalise the layout with precision before you even think about picking up a hammer. It’s a fantastic way to ensure your final installation is just as flawless as your design concept.
Choosing Frames and Art That Work Together
Think of your frames as the glue that holds your entire gallery wall together. They're just as important as the art inside them, transforming a random collection of pictures into one cohesive, powerful statement. The right frame can take a simple family photo or a quick print and make it feel like a masterpiece.
For a clean, modern vibe, sticking to a simple colour palette is your best bet. Using all-black, all-white, or all-natural wood frames gives an immediate sense of order and sophistication. This lets the art do the talking while the frames provide a crisp, consistent border that’s easy on the eyes.
Creating Cohesion Through Variety
If you’re leaning towards a more eclectic, personality-filled display, don’t shy away from mixing things up. Combining sleek metal, warm wood, and even modern painted frames can add incredible texture and visual depth. The secret to stopping it from looking chaotic is to find a common thread that ties everything together.
This unifying element can be really subtle. Maybe you choose frames with a similar thickness, even if the materials are different. Or perhaps you pick various styles but keep them all within a specific colour family—like mixing gold, brass, and bronze for a warm, shimmering metallic theme.
Curating Your Art and Photos
When it comes to what goes inside the frames, a subtle theme will give your gallery wall a polished, intentional feel. This doesn’t mean every piece has to be identical, but they should feel like they're having a conversation.
Here are a few ideas to get you started:
- A Colour Story: Pick pieces that all share a hint of a specific colour, like a touch of deep green or a splash of sky blue, to create a harmonious flow.
- A Common Subject: Group images around a single topic. Think botanical prints, architectural sketches, or your favourite travel photos from one incredible trip.
- A Consistent Style: Pull together a collection of vintage posters, black-and-white family portraits, or abstract line art to build a strong aesthetic. For a pro-level touch, it’s worth learning how to choose wall art like an interior designer.
The Finishing Touch Using Mats
Never underestimate the power of a good mat (sometimes called a mount). That simple border of white space between the art and the frame gives the piece breathing room, making it look instantly more professional. Playing with mats of different widths is also a great trick for fitting odd-sized images into standard frames. It's a simple move that makes even budget-friendly home decor tips for a luxurious look feel high-end.
It's clear that personalising our homes is more important than ever. The online picture framing market is booming, driven by how much we all value creating a personal, art-filled home that truly reflects who we are.
Hanging Your Frames for a Flawless Finish
With all the careful planning behind you, we’ve arrived at the most rewarding part of creating your photo frames wall design—the final installation. This is where your vision truly comes to life, becoming a permanent, beautiful feature in your home. And thanks to those paper templates, what could be a stressful guessing game is now a simple, precise task.
Here’s a trick to get the placement just right: for each frame, measure the distance from its top edge down to the hanging point (be it a sawtooth hanger or a wire). Now, just transfer that exact measurement onto the corresponding paper template on your wall and make a little mark.
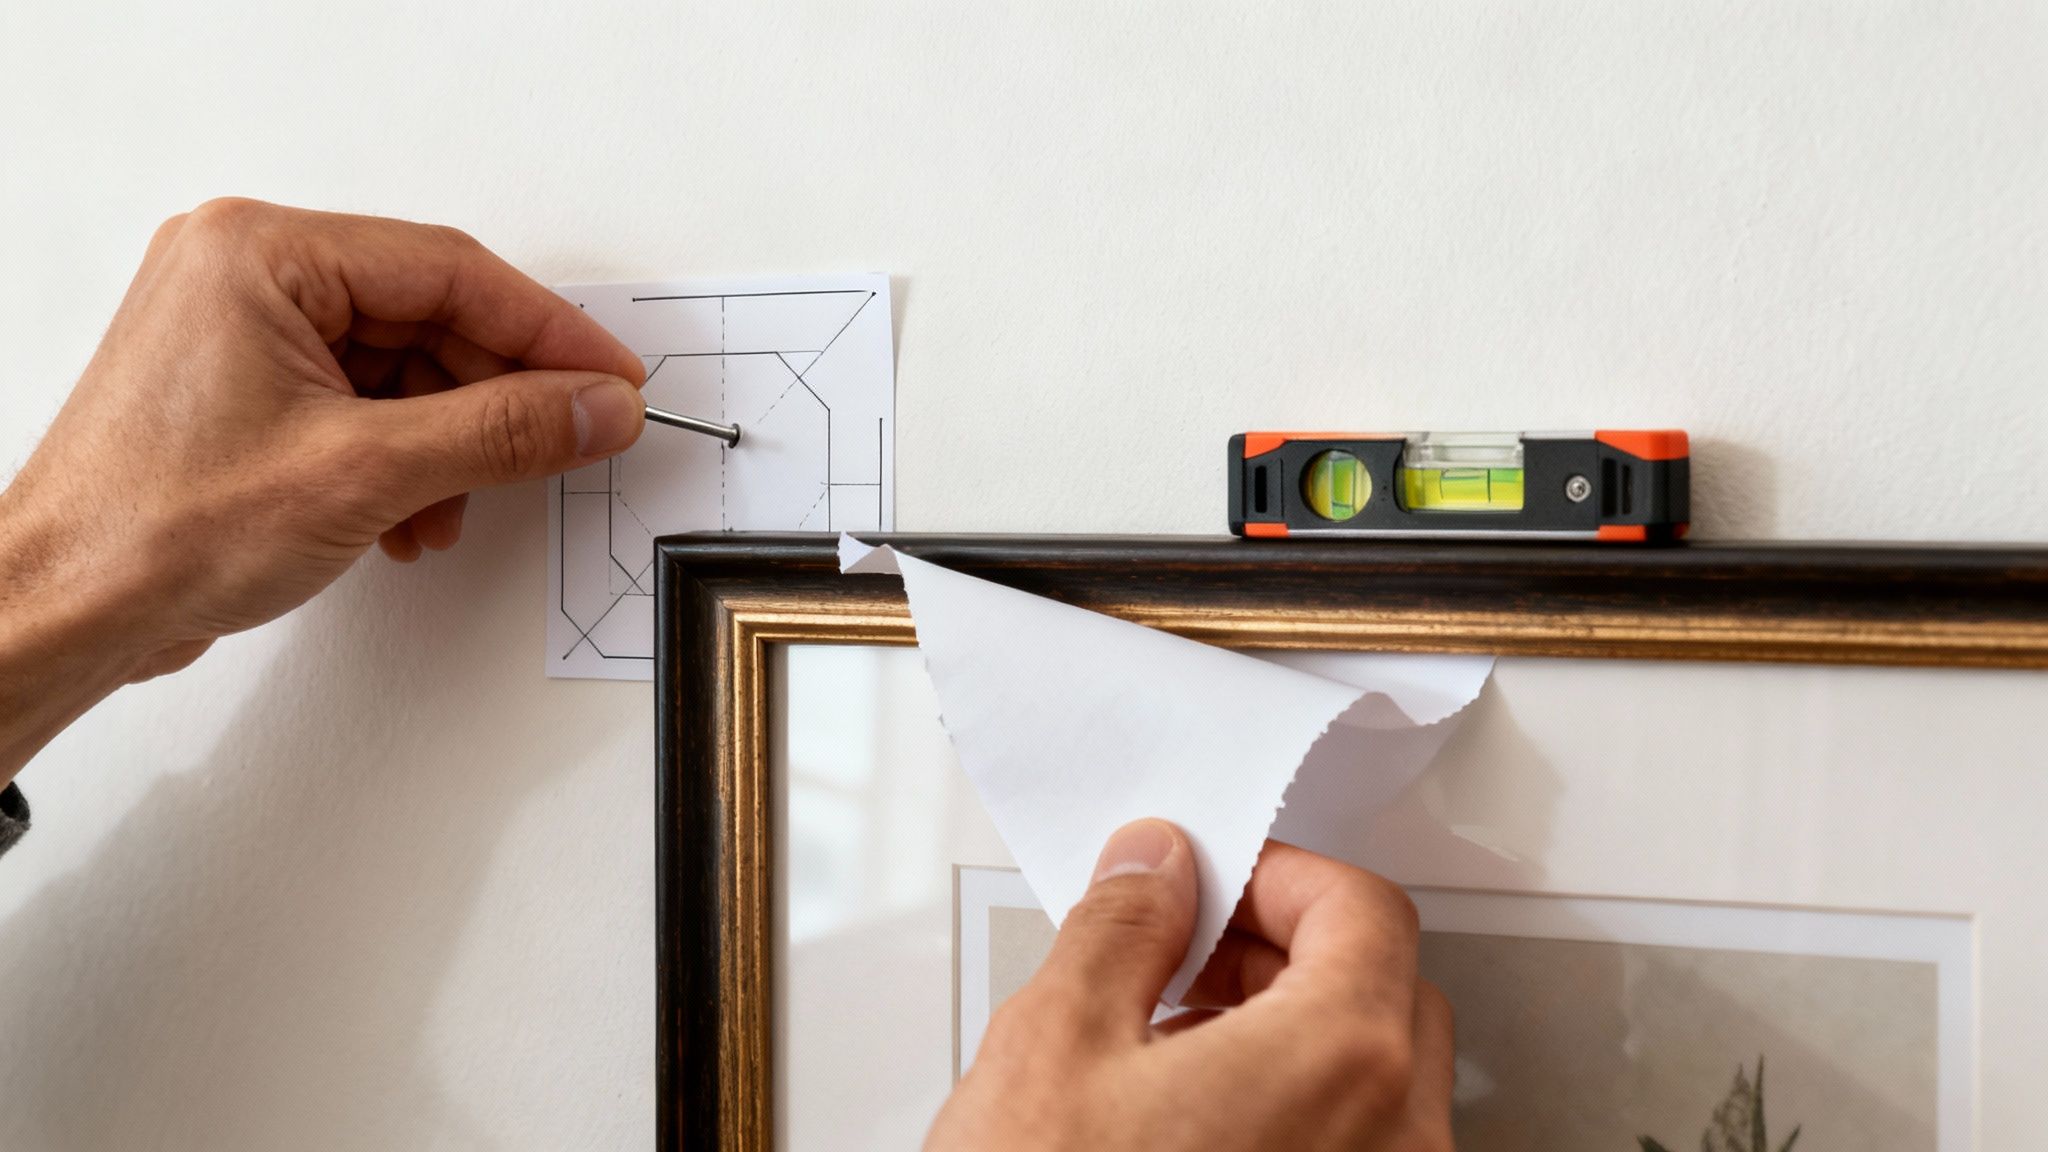
This simple step takes all the guesswork out of the equation. You can now hammer your nail directly through that mark on the paper. Once the nail is secure, gently tear the paper away. You’ll find the nail is in the absolute perfect position to hang your frame.
Choosing the Right Hardware for Your Walls
The hardware you choose is absolutely crucial for keeping your art secure. Different wall materials need different kinds of support, and getting it wrong can lead to fallen frames or damaged walls.
- Drywall: This is what most modern interior walls are made of. For lighter frames (under 5kg), a standard picture hook and nail will do the job. For anything heavier, it is strongly recommended to use a drywall anchor for that extra stability.
- Plaster: Often found in older homes, plaster walls can be a bit more brittle than drywall. To stop them from crumbling, it’s best to drill a small pilot hole first before you gently tap in a hardened picture hook.
- Brick or Concrete: These solid surfaces need a bit more muscle. You’ll have to use a masonry drill bit to create a hole, then pop in a wall plug before screwing in your hook. This creates a super-secure anchor point that can handle some serious weight.
Using the correct hardware isn't just about safety; it's about preserving the integrity of both your walls and your treasured art. A few extra minutes spent choosing the right hook can prevent a frustrating accident down the line.
Achieving Perfect Alignment
The final touch for a truly professional-looking gallery wall is making sure every single frame is perfectly level. Even one crooked frame can throw off the whole look and feel of your arrangement.
For individual frames, a traditional spirit level is your best friend. Just rest it on top of the frame and adjust it until the bubble is right in the centre.
If you’re working with a larger, more complex layout, a laser level can be a brilliant investment. It projects a perfectly straight line across the wall, making it incredibly easy to align the tops or bottoms of multiple frames with absolute precision. This meticulous approach to hanging guarantees your final execution is just as impressive as your initial design, leaving you with a flawless finish you’ll love looking at for years to come.
Common Questions on Gallery Wall Design
Even with the most meticulous plan for your photo frames wall design, a few questions are bound to pop up. This is where we tackle some of the most common challenges and queries, giving you that last bit of guidance before you stand back and admire your handiwork.
One of the biggest hurdles is placement. Getting the height right is absolutely crucial—it’s the difference between a gallery wall that feels intentional and one that seems to be floating awkwardly in space. The professional approach is simple: aim for the centre of your entire collection to be at eye level.
Finding the Perfect Height
A great rule of thumb is to centre the whole arrangement at eye level, which is typically about 145-152 cm (57-60 inches) from the floor. This measurement isn't arbitrary; it ensures the art is immediately comfortable to look at the moment someone walks into the room.
But what if you're hanging your gallery above a sofa, a console table, or a headboard? The rule changes slightly. You'll want to leave about 15-20 cm (6-8 inches) of breathing room between the bottom of the lowest frame and the top of your furniture. This gap is so important because it prevents the composition from feeling cramped and visually anchors the art to the piece below it.
Mixing and Matching Frames
Can you mix different frame styles and colours? Absolutely! An eclectic mix can inject so much personality and visual interest into your wall. The secret to making it look curated rather than chaotic is to keep one or two elements consistent to tie everything together.
Here are a few ways this can be done beautifully:
- A Unified Colour Palette: You could mix all sorts of frame styles—some ornate, some sleek and modern—but stick to a tight colour palette, like black, white, and a single metallic accent like gold.
- Consistent Material: Another great approach is to use frames in different colours and finishes but ensure they’re all made from the same material, like wood. That shared texture creates a subtle but very effective sense of harmony.
Your gallery wall is your personal statement. Don't be afraid to break a few 'rules' to create something that truly reflects your unique style and story. The most beautiful arrangements are almost always the ones that feel the most authentic.
Hanging Frames in a Rental Home
This is a big one. What are some damage-free ways to hang a gallery wall when you're renting? Thankfully, you have excellent options that don't involve a single nail.
Adhesive picture-hanging strips are a renter's best friend. They hold securely and, best of all, remove cleanly without leaving behind holes or sticky residue. Be sure to check the weight limits for each strip.
Another fantastic, and very stylish, option is to install one or two picture ledge shelves. This allows you to simply lean your framed art against the wall, giving you total freedom to rearrange your display whenever you feel like it with zero wall damage. This approach has become incredibly popular, reflecting a wider interest in personalised home decor. The market for home decor continues to grow, with hanging frames leading the charge as a popular way to personalise a space.